Exact Board Size Progression in ZooBlocks
The ZooBlocks board grows in six exact steps, from 16 cells at level 1 to 81 cells at level 15. Each size changes which strategies are realistic, so this page pairs the numbers with the tactical shift they cause.
The Exact Growth Curve
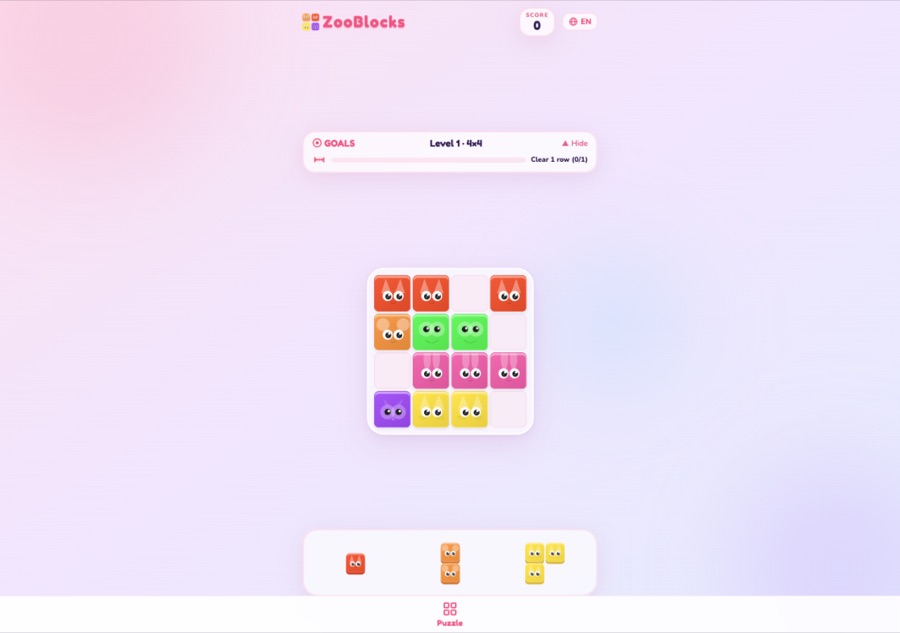
- 4×4 — levels 1–2. 16 cells.
- 5×5 — levels 3–4. 25 cells.
- 6×6 — levels 5–7. 36 cells.
- 7×7 — levels 8–10. 49 cells.
- 8×8 — levels 11–14. 64 cells.
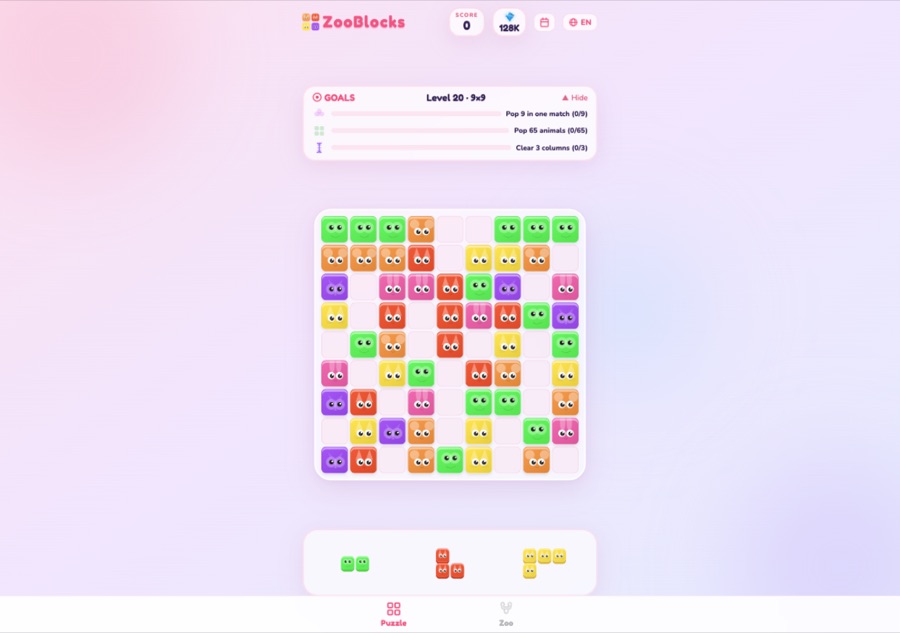
- 9×9 — level 15 and beyond. 81 cells.
After level 15 the board is at its maximum; goal quotas and daily quests take over the difficulty curve instead. Levels keep presenting that same 9×9 board with fresher goal mixes, which is why high levels reward preparation over reflexes.
Small Boards Are Survival First
On a 4×4 board each row is only four cells, so line clears arrive fast — but so does game over. Big shapes are partly filtered out: the game never hands you a piece that cannot fit the current board. That leaves a mix of singles, dominoes, L-shapes, and short lines.
The real skill at small sizes is keeping empty cell parity. Two awkward one-cell gaps in different corners are survivable only if your tray produces singles; two of them in the same line is fatal. Clear early, keep corners flexible, and treat setup play as too expensive until the board grows.
Mid Boards: Setup Becomes Real
From 6×6 on (levels 5–10), the math flips. Lines take five or more cells, so pure reactive clearing is no longer fast enough to keep the board empty — but there is finally room to leave structural gaps and feed same-animal clusters. This is where overlap turns stop being lucky accidents and become planned outcomes.
A good 6×6–8×8 approach: split the board into quadrants mentally, run each quadrant to one gap short of a line, and hold pop placements in reserve so a single piece can finish two lines plus a pop when the tray cooperates.
Large Boards: More Room, More Responsibility
The 9×9 board (level 15+) holds 81 cells, five more lines than the starting 4×4, and the same three-piece tray. Nothing about the tray changed — only the board did. Long runs at this size are won in the mid-game: players who banked two or three well-spaced clusters in the early turns convert them into ×4 and ×8 line turns comfortably.
Bigger boards also change the daily economy: score goals scale with board cells, so the same percentage of a 9×9 board cleared is worth roughly five times the levelling rate of a 4×4 clear.
How the Curve Feels in Practice
Most players remember the specific moment a board grew. 4×4 teaches placement discipline; 5×5 and 6×6 teach cluster planning; 7×7 and 8×8 teach restraint — the board is now big enough to beat yourself by over-clearing; and 9×9 teaches patience, because the biggest multiplier turns need two or three turns of preparation to land.
Cell Arithmetic Across the Curve
| Board | Cells | Full line | One line clears | Row + two columns |
|---|---|---|---|---|
| 4×4 | 16 | 4 | 800 | 12 × 100 × 8 = 9,600 |
| 5×5 | 25 | 5 | 1,000 | 15 × 100 × 8 = 12,000 |
| 6×6 | 36 | 6 | 1,200 | 18 × 100 × 8 = 14,400 |
| 9×9 | 81 | 9 | 1,800 | 27 × 100 × 8 = 21,600 |
The lesson from the table: cell count scales linearly with board size, but the multiplier turns it into a power curve. One extra simultaneous line at any board size roughly doubles that turn's line value — the same trick grows more valuable on bigger boards simply because more cells ride the bonus.
Training Plan for Each Size
- Levels 1–4: practice not dying. Accept one-line clears and learn which shapes trap you.
- Levels 5–10: practice the cluster-and-gap pattern deliberately; target at least one planned overlap turn per level.
- Levels 11–14: practice restraint — bank two lines before spending either, then finish both plus a pop.
- Level 15+: full-range thinking: keep pop clusters alive for turns, and use score-poor placements early only when they set up the board.
Ready to Play?
Everything you read here is already live in the game — your browser is the only thing you need.