ZooBlocks runs a five-layer loop: place pieces from a three-piece tray, clear full lines, pop matching animal groups, bank your score as diamonds, and reinvest those diamonds in the zoo. Every layer makes the next one stronger, and all of the rules below come straight from the live game.
The Basic Turn
Each turn shows exactly three pieces in the tray, and you can see all three before you commit to anything. Drag or tap a piece onto the board; every cell of the piece must land on an empty cell, with no rotation and no overlap.
Two small rules matter more than players expect. First, the tray only refills once all three pieces are used, so leftover awkward pieces stay with you. Second, the run ends the moment none of the remaining tray pieces can fit anywhere on the board — it does not matter how much empty space remains.
3
Three Pieces
The full tray is always visible, so strong play means planning all three placements, not just the first.
FIT
Exact Placement
No rotation, no partial fits. A two-cell gap only accepts pieces that cover exactly two cells.
END
No Space, No Turn
The run stops as soon as the tray cannot fit on the board, on any cell, with any piece.
The Board Grows With You
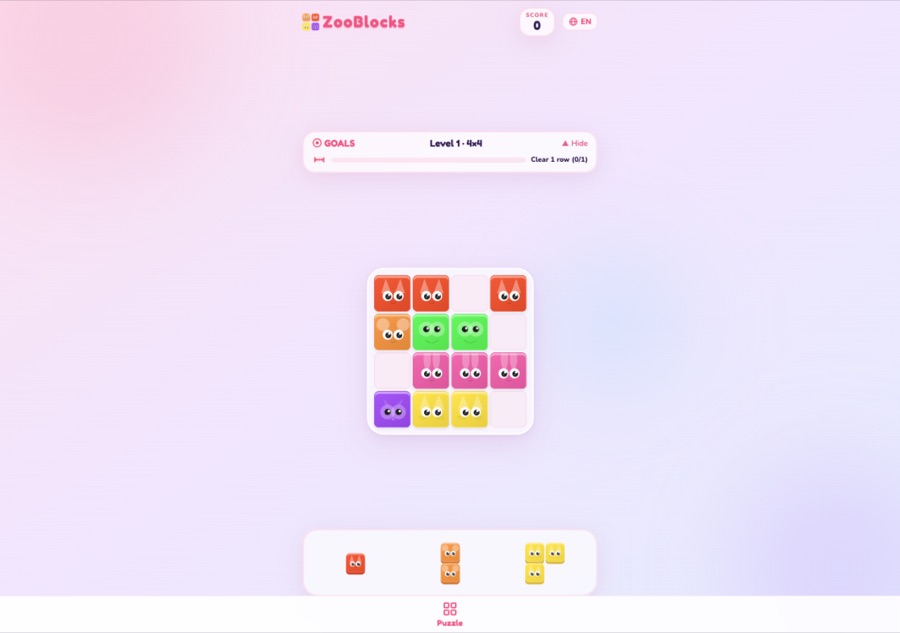
Level 1 starts on a 4×4 grid. As levels clear, the board steps up to 5×5, then 6×6, and keeps growing until it reaches 9×9 at level 15. Bigger boards hold more room for setup turns, but they also ask for more pieces before any line completes, so the strategic texture changes at every step.
A 4×4 board mid-run: the fox row is one cell away from clearing, and a bunny trio is already connected.
Line Clears and the Multiplier
Fill every cell in a row or column and the line disappears immediately, paying 100 points per cell — with a twist for multi-line turns:
1 line — base points, ×2 bonus on the line cells.
2 lines — ×4 bonus.
3 lines — ×8 bonus.
4 lines — ×16 bonus, and 5 lines pay ×32.
A one-row clear on a 4×4 board therefore pays 4 cells × 100 × 2 = 800 points, while a turn that finishes a row plus two columns on the same board pays (4+4+4) × 100 × 8 = 9,600 before pops are added. Using the same 12 cells across two placements would pay far less, so finishing several lines in one placement is one of the two big skills in the game.
Animal Pops
Any connected group of three or more same-animal cells pops. Connected means touching edge-to-edge; diagonal cells do not count. Flood-fill rules apply: a pop removes the entire connected group at once, so five animals touching in an L shape all disappear together.
There is one guardrail worth memorizing: a group only pops when it contains at least one cell from the piece you just placed and at least one older cell. A fresh piece sitting alone among its own cells never pops, which keeps the board fair and rewards adjacency planning instead of lucky drops.
Overlap Turns Paid Double
When one placement completes lines and pops animals at the same time, both systems score on their own, and shared cells are counted inside each system. Because pops are added on top of the line total, an overlap turn reliably beats a pure line clear made from the same pieces.
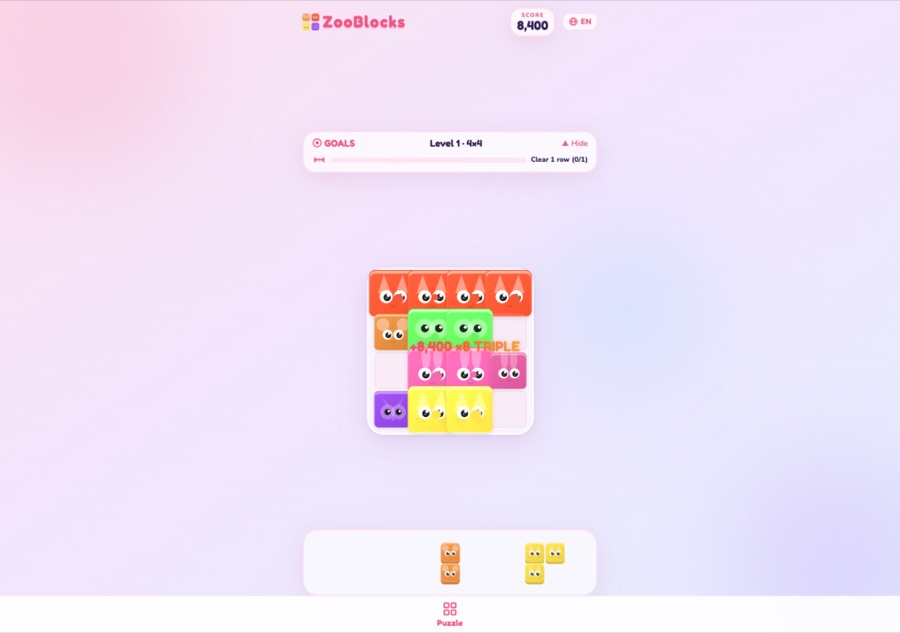
Concrete example, from a real 4×4 turn: place a fox that completes a fox row while two columns are already full. The clears remove 10 cells. The three-line turn pays 10 × 100 × 8, and the four-fox pop adds 4 × 100 more: 8,400 points in one placement.
The same example, live: ×8 TRIPLE line bonus and an 8,400-point turn from a single fox placement.
Diamonds and Zoo Growth
When a level ends — cleared or failed — the level score converts into diamonds. Developed zoos apply a multiplier: zoo income per second divided by five. A fresh zoo earns ×1; a zoo running 50 diamonds per second still converts at ×1 until upgrades and unlocks push past 10 per second; a 210-per-second zoo converts at ×42.
Diamonds are the only currency in the zoo view. They buy new animals (the bear starts at 500) and raise animal levels for stronger income. Only the newest animals multiply your economy quickly, so early spending discipline is a scoring skill too — the Animals guide and the Strategy guide cover the priorities.
Pro tip: The tray refills only after all three pieces are placed. When two pieces are awkward, place the third in the least damaging spot and treat the refill as the real reset.
Best Beginner Flow
Work from the outside inward so the center stays open for bulky shapes.
Decide the role of all three tray pieces before placing the first one.
Bank early line clears for goals; start same-animal clusters when the board calms down.
Clear level 1 once to reach your zoo, then buy the 500-diamond bear first.
Save daily quests for runs that already suit them; never trade a doomed run for a row or two.
Ready to Play?
Everything you read here is already live in the game — your browser is the only thing you need.